Home
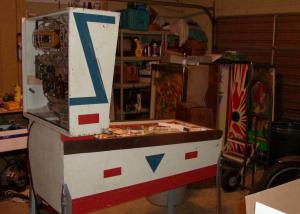
Gottlieb Airport Pinball 1969
IPDB: http://www.ipdb.org/machine.cgi?id=35
August 21, 2007
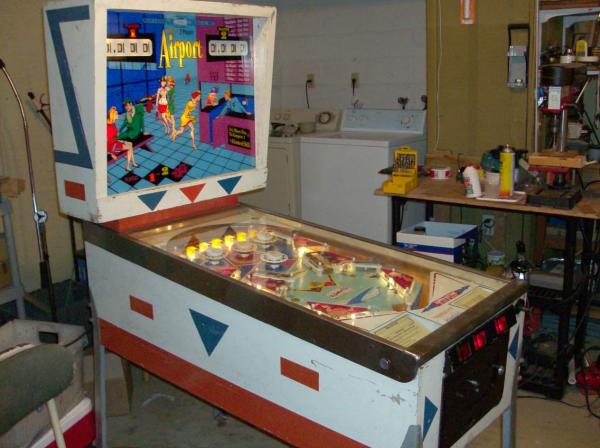
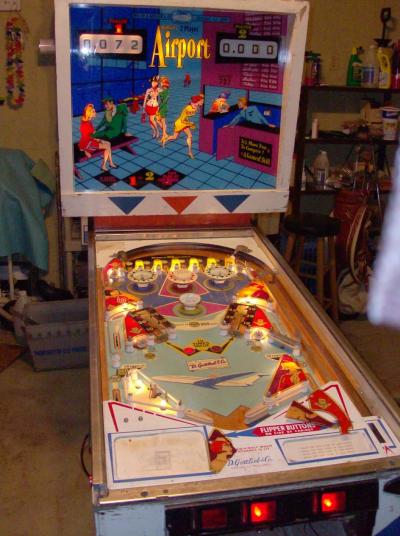
This machine is in average condition for one of this era. The playfield has moderate wear. The backglass has minor flaking and tape marks. I remember playing this game when I was about 9-10 in the 70's. I always liked the 'vari targets' that were featured on this game. The harder you hit them the more they score.
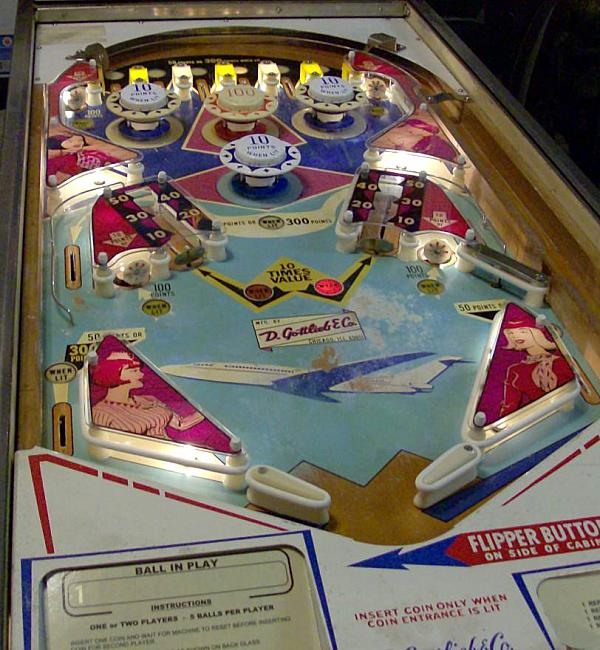
Here's the playfield close ups:
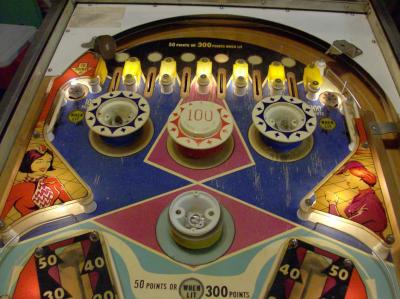
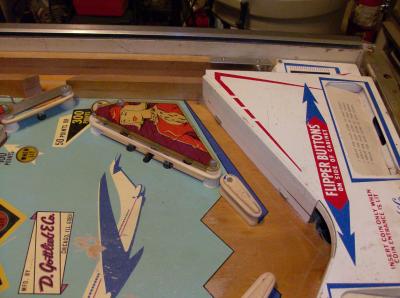
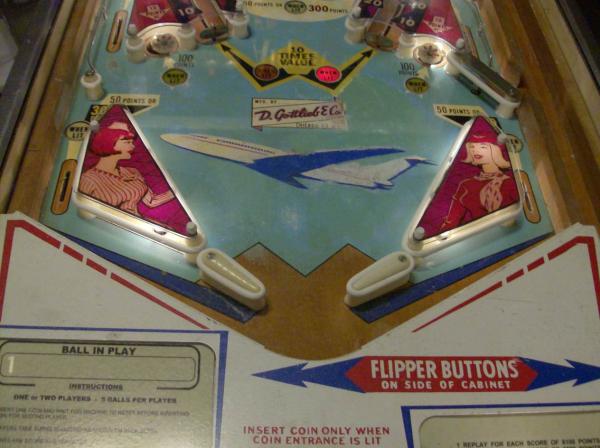
Lower Playfield:
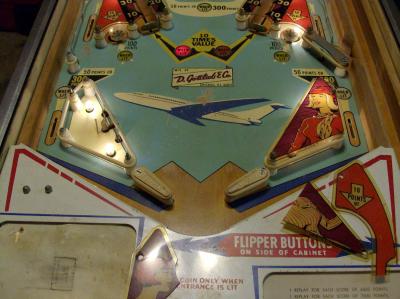
You can see the wear. Also 3 of the plastics are cracked. 2 are cracked in half and one just has a small chunk on the end taken out. On initial inspection I noticed a bit of White Lube ( or similar grease ) on the wipers and rotor contacts. The person who owned it had a relative maintain it for a while. Overall everything mechanical was in good shape.
I cleaned the cabinet. It appears to be repainted according to the IPDB images - whoever did it did a good job - it's kind of close. The webbing looks good. The give away was the glossy painted finish. This really stinks - the BEST Gottlieb cabinet I've had was the rotted out Top Card which was pitched....
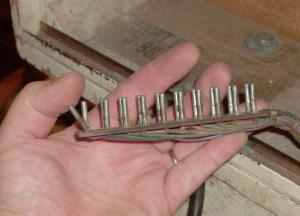
Connecting it up: Two pins on the interconnects to the head had broken pins. They were just flopping around. No real reason to repair these until the break off. I'm not even sure if you can - I'll look into that later. I carefully plugged these in.
Power Up!
Before plugging this in I had to replace the power cord - grounding to come later. On power up the machine was dead. The 15 amp fuse on the tilt board was blown. Usually this indicates something is stuck on the board or maybe a blown coil. I did a quick inspect and didn't see anything so I replaced the fuse. The machine powered up but the 10 point bell relay and score reels were stuck. This indicates a stuck switch on the playfield. To find it I clipped an ohm meter across any of the many 10 point switches on the playfield. Sure enough it read 0 ohms. I then spread all of them by placing the contact on the outside of the rubber using the rubbers to hold the switches apart. The ohmeter now read 38 ohms - typically for a coil - that's good. I then turned on the machine, started a game, and closed each switch one by one until the 10 points got stuck. The switch was just mis-adjusted.
I attempted to play a test game to see it if vaguely acted like a pinball machine - it did. There's about 1/2 dozen problems but all in all this will be a straight forward repair / restore.
August 24, 2007
I stripped down the playfield to clean and wax. Not expecting anything special I went ahead and applied a small test patch of Greased Lightning to the top of the playfield. All is ok..
%&^$&&^#((*&()*#&&&& ( left out for the kids ).
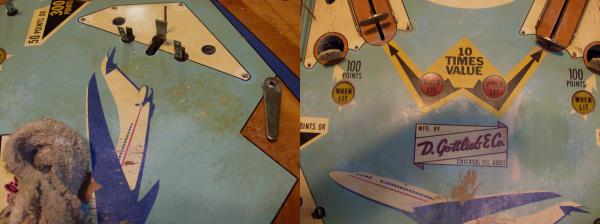
Here's the lower playfield prior to cleaning. It had the yellowing in spot so I applied a little Greased Lightning. As I started cleaning the colors began to become bright and the yellowing was going away UNTIL a disaster occured.
In this shot you can clearly see the yellowing. Unfortunately the Greased lightning sat just a bit too long and took up the ink. You can see the white patches on the right photo along with a lightened blue wing on the airplane. This is the first time I've ever seen this. Fortunately the playfield wasn't the greatest to begin with but it seems there's something to learn here. The test on the upper playfield was fine - it was done on heavy black and blue inking. The lighter sky blue ink must have been very thin. This Sucks!!!
I did not get this problem on Thoro Bred, Bronco, or any other game. I'm not real sure why this occured but I thought it important to document. Greased Lightning can remove paint and I've let it sit on playfields for several minutes with no mal effect. It's great for eating the yellowed smoke damage from cabinets. This is the first time I've seen it take the ink up especially after the upper playfield test was fine... Oh, crap... Oh, well.
All this has got me to thinking of methods to fully restore the playfields. They were originally silk screened and I guess new screens could be made but this is the digital age. You can print directly on wood using a UV Solvent printer ( approx. cost $60,000 for a cheap one ) or perhaps create an overlay using standard pigmented aqueous inks and heavy lamination. The latter is very cheap - the hard part is creating the graphic and applying it. I have to research existing overlays for pinball - I've seen some horror stories on the web about it.
While looking for restoration methods I came across this site: http://www.classicplayfields.com/photo1.html - This IS how to make a playfield. No shortcuts. I just don't think my '69 Airport justifies the expense but it's amazing to see the effort some put into restoration.
Plastics
I decided to make new plastics ( it's got it's own page ) more out of curiosity to see what's involved. They came out surprisingly well - I'll keep posted for issues like fadin, tape unbinding, etc.
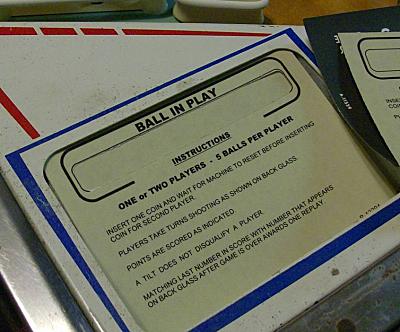
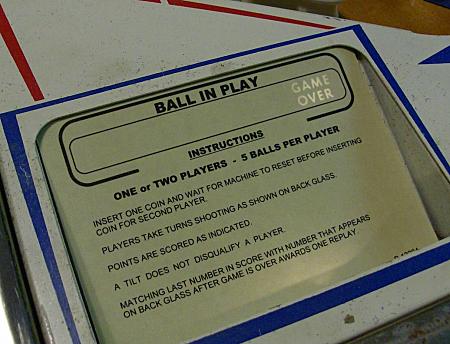
I also redid the score cards. In Airport Gottlieb shines a light through the instruction card to show 'game over' and 'ball in play'. Originally Gottlieb used two card - one with black on white that's placed in the instruction card slot upside down and another with a rectangle cut out. Looks like this.
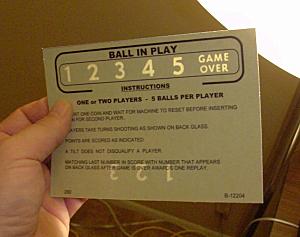
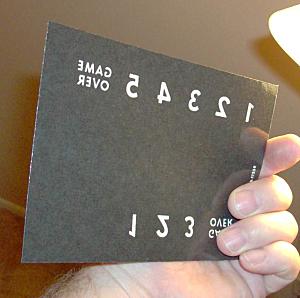
I decided I'd try to make a single card with both sides. The reason is the the cutout card looked funny. I thought it'd look better as one card. The trick is making sure your back and front digital images are the same dpi. Using an overlay / layer you can determine the proper positioning.
I used a thin card stock and laminated the card. Here's the finished card back, front, and in the machine.
I did a quick horrible touch up job. This playfield need replacing or re-screening.
To Be Continued ...