Home
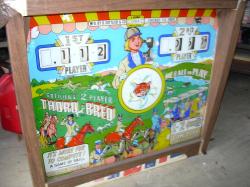
GOTTLIEB THORO BRED 1965 - IPDB link
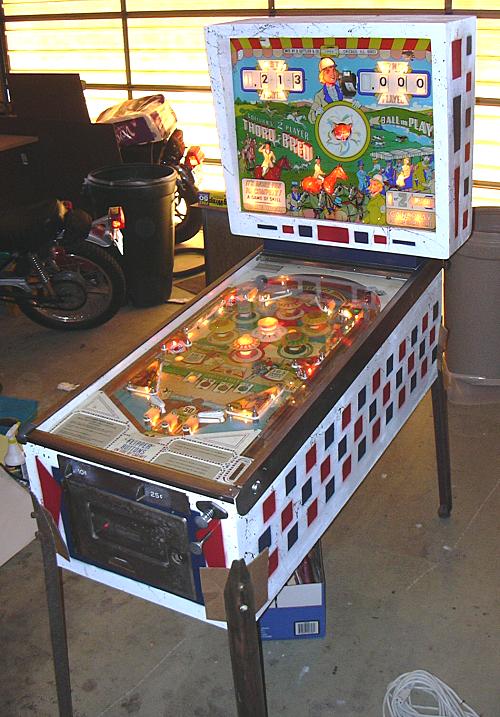
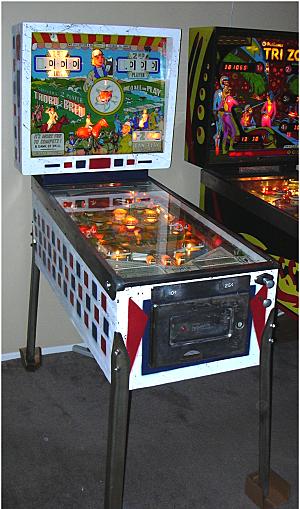
UPDATE: Project complete: Sept. 20, 2006 - (photos)
August 27 2006.
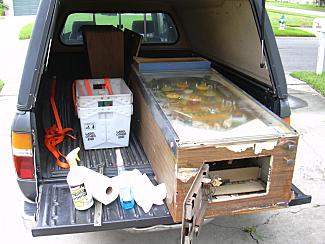
Found pinball through classifieds. The entire cabinet had been wrapped in brown wood tone shelving paper. A complete re-painting will be required. Backglass is typical of this vintage having moderate peeling and flaking. Some cabinet de-lamination from Florida humidity. No paperwork. Miraculously the game functioned on location, well, came on and scored some points. The contacts, coils, and mechanical seemed restorable and not corroded. One lockdown bar end cap was missing. Normal rusting all exposed metal.
Cabinet covered with shelf paper.
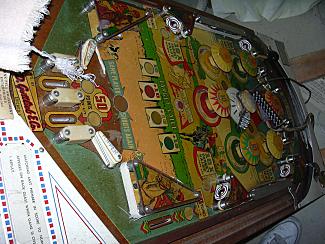
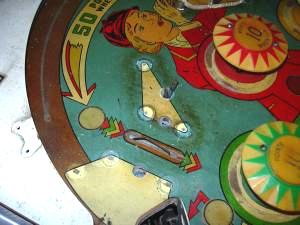
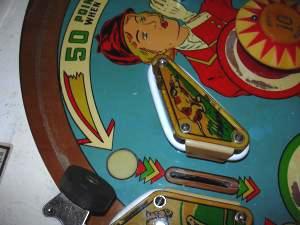
Playfield - normal wear for age near pop bumpers and flippers. Note the masking tape on the right kicker used instead of a rubber - interesting.
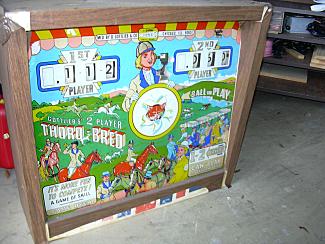
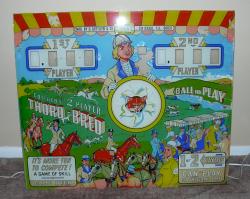
Backglass flaking heavily. Will try 'Triple Thick' per Marvin's instructions in order to preserve the glass.
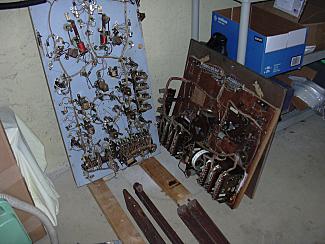
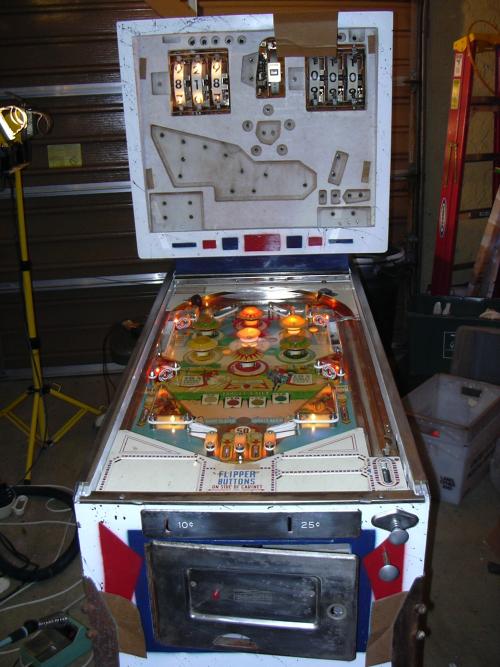
The playfield and head circuitry. Initial examination revealed many mis-aligned leaf switches but no burned coils. Amazingly the flipper assemblies are in great shape. I imagine the game got little play for the many years in storage. The legs appears rusted beyond repair but I'd rather have the 1965 legs then modern replacements. Same with the coin door.
I pulled back some of the shelving paper. The original paint is still there but most comes off with the paper. I guess it sounded like a good idea at the time to put the paper on. Anyway I'm debating whether to re-paint or simply apply a cabinet wrap using my wide format printer and laminating machine. If I apply a wrap I can leave the original paint, bad as it is, for future owner. If I paint it will require sanding, priming, and painting which will eliminate the original forever.
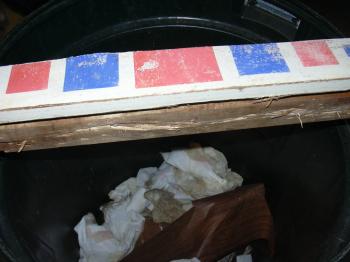
I will need to replace the cabinet bottom plywood - it's warped like space in a time-travel theory.
Aug. 31, 2006
Here's the backglass. It's got major flaking and peeling. I will clear coat it for preservation but will expect to replace it at the end of the project.
Talk about every possible thing that could be wrong is wrong ...
Cabinet and Head Stripped and degreased. I used Greased Lightning to remove the glue and cigarette smoke. Note: Greased Lightning will remove paint so make sure to apply and remove quickly if the goal is to preserve the cabinet. Afterwards the colors were ok but worn. Unfortunately there was extensive evidence of termite damage so although I'd prefer not to paint I have no choice. I'm still not committed to painting but am strongly biased to do so.
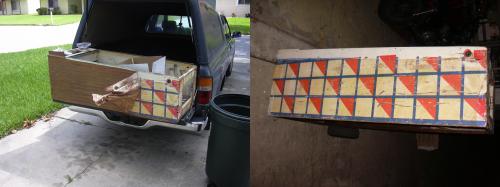
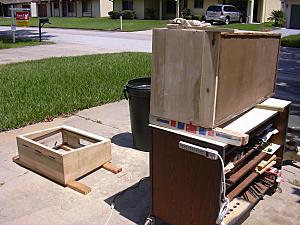
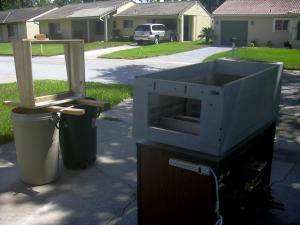
Here's a shot of the empty cabinet after removing the bottom which was water damaged, warped, and useless.
![]()
The Head. Greased Lightning removes the cigarette stains and shelf paper glue.

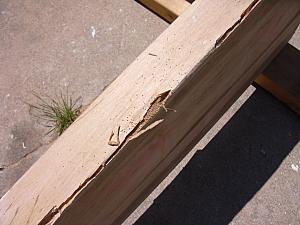
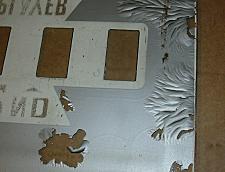
Here's some of the termite damage. It's also in several other places on the head and body but not significant enough to trash the machine. The item shown below is the worst and is a part of the head. Termites leave mud trails. Carpenter Ants leave sawdust. Drywood termites leave little granuals with 6 sides. This is what I've got here. This section of wood will be replaced with a new piece of wood. Unfortunately the termites ate through the visible front portion of the head as shown.
Next I looked at the cabinet circuitry.
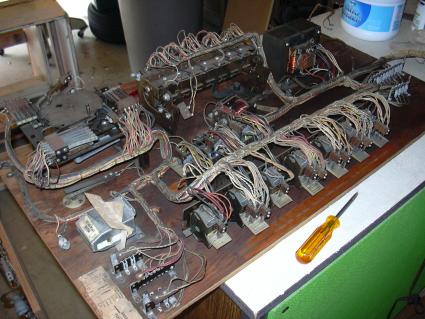
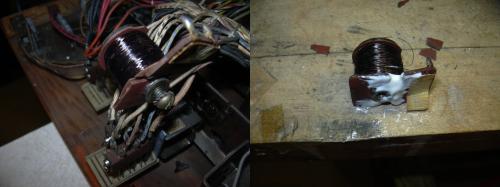
Many switches were mis-aligned from fat fingers or other sources. Two of the A-7836 coils were disintegrated. I'm attempting to epoxy them before I order new ones. To me a large part of working on EM Pinball is to see what you can replace with parts from the garage as opposed to ordering new parts. Actually the technology used to create the original parts wasn't very more advanced than a typical home garage shop so this isn't really Jerry Rigging. If the epoxy holds we're good to go. If not then, due to the particular size of the coil, I'll need to order some.
Sept. 1, 2006
Replacing termite damage in the head
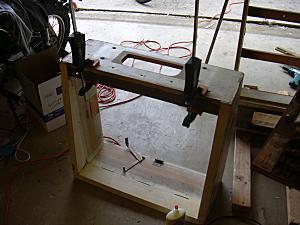
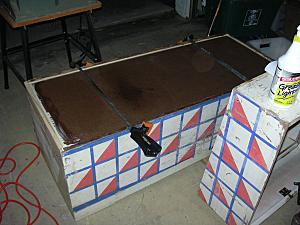
New Cabinet Bottom made from hardboard. Note: Marvin's pinball page says to kick out the back panel. Unfortunately I split the back panel in 2 pieces with a few blows - It didn't even start to separate from the cabinet. I'm sure this works for some cabinets but not in this case. I had to replace a portion of the back cabinet. An easier approach is to cut down the portion of the back cabinet so you can slide in the new bottom panel. Simply cut the panel 1/2 inch longer and glue/nail to the back end.
Sept 2, 2006
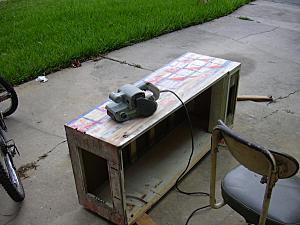
Paint stripper? We don't need no stinkin' paint stripper! After wasting a few hours with gel paint stripper, which worked well, I decided to use the belt sander. Took about 2 hours to strip the cabinet and head to the wood. I'm slow.
Having at it with a belt sander ( sacrilege! )
Sept. 3, 2006
I've been sanding the cabinet down ( sorry - I know original paint is better but this box had a lot of termite damage and I think saving it is past tense ). Lot's of little entry holes on the left side of the cabinet. I will have our pest control company suggest a treatment on Tuesday. As far as I understand the termites can still be active inside the wood. I've tapped and searched but all I've found is old damage. The head actually had severe damage as I went around every inch exposing the damaged wood. There are ways to treat the cabinet without knowing the location of the nest, if one exists, like heat or microwave.
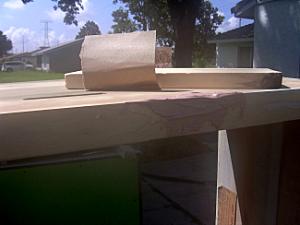
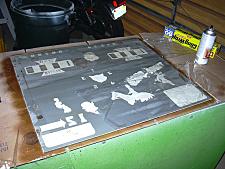
Expose termite damage and granules.
Sanded cabinet and head.
Sat. Sept. 9, 2006
Ok, where the heck are we.... painting the cabinets..
I swear I checked every crevis BUT still termite damage pops up. Here's more termite/bondo repair to the head:
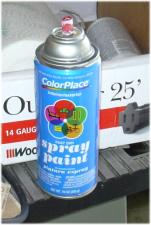
Priming the cabinet and head using the cheapest walmart spray paint primer - .98 per can in 2006!
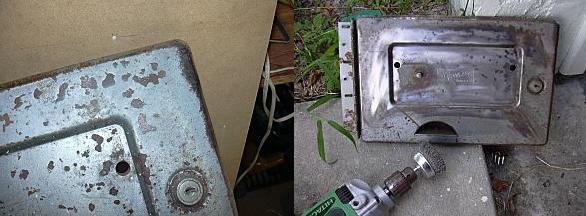
Grinding the coin door with a wire brush and drill waiting between coats ... It's actually looking good now compared to the door when received (left) and ground (right). I would NEVER do this again. Well, maybe if I was really bored.
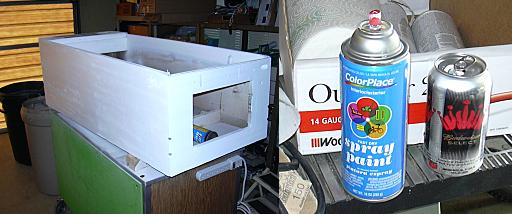
Ok, We're in Orlando so afternoon thunderstorms will end the day. Here's were I'm at: poorly smoothed but painted cabinets ( I can't sand or prep to save my life ). A half ground coin door. A semi-repaired lower control panel. About $150 into something that would have hit the can under other circumstances.
Images:: cabinet painted white on left. If you're curious it takes about 6 cans of paint and 12 cans of budweiser select to properly paint a pinball. Now if I could only get an endorsement...
September 10, 2006
Ok, Everything's white and bondo'd. Now's time to 'flick' the cabinet (spatter,splatter,mess up, etc) like a good Gottlieb should be. I've invented a new spatter brush based on sound economic principles - don't buy what you don't have to... I took a bout a foot of 16 gauge stranded wire, stripped the ends 2 inches, and looped them around. This is used with black enamel paint to create the 'spatter' effect used on this vintage Gottlieb. It's a lot of fun to do. Dip the wire in the paint and flick with your thumb. Credit goes to Marvin's site for the flick idea ( Shaggy on the video? ) but I want my due for cheaping out with the wire :). I think I over did it but it looks kinda cool.

I'm jumping ahead - I forgot to take a picture while spattering the cabinet.
Tuesday, Sept. 12, 2006.
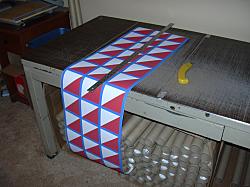
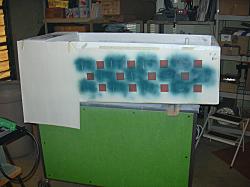
Stencil day.
Stencils are fun. I originally started to copy the original cabinet design but got intentionally lazy. Here's the pattern I was going to try. These were printed on a large format printer. The stencils I used were printed on 80 lb. bond 24"x36" paper. The rolls I have are too thin for stencils. The heavy paper reduces overspray and saturation.
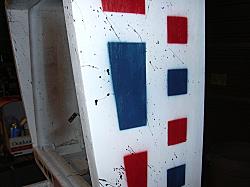
Here's what I actually did:
And wound up with this:
Well, It looks like a pinball, don't it? The legs are the original legs but will be replaced as they're really too rusty to recover.
Saturday, Sept. 16, 2006
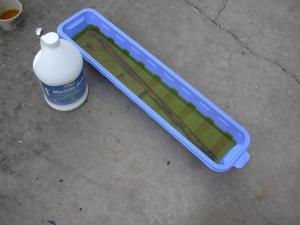
It's de-rust day. I couldn't find anything specific to remove the rust except naval jelly. Instead I bought 2 gallons or muriatic acid ( hydrochloric acid ) to make short work of the rust. This stuff is serious and has tons of precautions. It removed ALL the rust from any part I dropped in the bath in about 10 minutes or less. This stuff is about $6 per gallon. Sold in Home Depot, Lowes, or any pool supply store. It's also great at cleaning concrete.
You'll have to rinse the metal thouroughly after the bath and may have to wire brush the metal to remove the orange haze which is new rust forming almost instantly after the bath. One run will do it. This worked great on the coin door which was rusted on the inside. I'll need a longer bucket to do the legs.
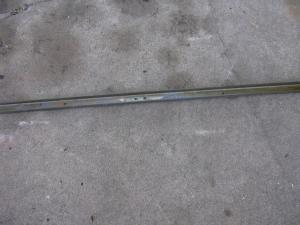
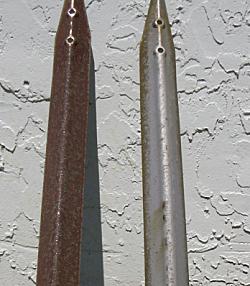
Legs - before/after acid bath - that's not rust on the right leg - it's metal damage from the rust. These legs were heavily rusted and t normal people will replace them. But not me, nope, I need to smell those hydrochloric acid fumes. Yummy!
Sunday, Sept. 17, 2006
Cleaning the playfield. The playfield was severely yellowed. I tried naptha but it worked so slowly it took about an hour to clean 3 square inches. I then resorted to 'old faithful' Greased Lightning. I imagine any degreaser would do the job. Be careful - it will remove paint. It took about 3 hours to clean and wax the playfield. No restoration or touch up was attempted. I will revisit this later to raise the lamp inserts. Also note the pop bumpers need to be replaced as all parts are yellowed.
After cleaning our the player 1 score reels, replacing the bulbs, cleaning the contacts, and a few other mechanical issues, and de-buzzing the screaming hold coils, the game now plays well. You can de-buzz a coil by either filing the coil stop to provide better mating, or insert a metal shim on the bolt to move the stop slightly closer. Some people would actually purchase a new coil and perform a longer lasting fix. I've still got to clean and bulb the back box. It's been a long time since I've played a game of this vintage - I've forgotten how loud the bells are! I had to disconnect them to work on the score reels! I even painted the start button red.
Tuesday Sept 19, 2006
Triple Thick time ... For full instructions see Marvin's Pinball Site. This was the first one I've ever done. So far so good. After applying the Triple Thick, applying Cling Wrap into the bad areas, and allowing to dry overnight the Cling Wrap feel right off! Wow - Marvin's page is free and it's better advice than what I pay for.
Made new score cards. ( no photos )
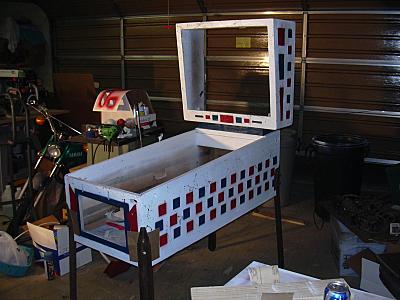
Wednesday, Sept. 20, 2006
Finished coating the backglass and place it in the head. Woo Hoo! I'll replace the legs when I move the machine inside and install locks at that time ( and the few remaining lamps - I ran out ). That's cardboard shimmed behind the leg bolts if you're curious. It'll be removed later. I still need an end cap for the lockdown bar. Anyone willing to donate to the cause ???... I didn't remember these machines being so LOUD!
Next up ... William's Jive Time